Wheel hop on the S550 and S650 Mustang comes down to how the independent rear suspension is mounted. The
subframe attaches to the chassis at four points via soft rubber bushings that prioritize street comfort
and isolate noise and vibration. Under hard acceleration or braking, that compliance allows the subframe
to shift slightly and the axle to load and unload rapidly, resulting in wheel hop that breaks traction
and stresses driveline components.
The Stop the Hop Street Starter Kit (MPN 555-4455) goes straight to the root of the problem. Instead of
patching things up with stiffer half shafts or other driveline band-aids, this kit locks the subframe to
the chassis with a trio of parts that work in concert: alignment dowels that fill the bolt hole voids
and square the subframe to the body, billet aluminum bushing supports that take up the slack in the
rubber bushings to stop vertical movement, and chrome moly steel IRS subframe support braces that tie
the subframe directly into the chassis at five points per side.
This guide breaks down what comes in the box, the tools you'll need, how tough the job really is, and
walks you through the installation step by step. If you're thinking about tackling this in your own
garage, read through the whole process first. The work is straightforward, but you'll need to loosen the
subframe hardware in a specific order, so knowing the sequence before you start is key.
What's Included
The Street Starter Kit bundles three Steeda products:
- IRS Subframe Support Braces (555-5754): Five-point braces made in-house from chrome
moly steel.
Each brace bolts into factory mounting locations along the framerail and ties the front subframe
mount and lower control arm mount directly into the chassis.
- IRS Subframe Bushing Support System (555-4437): A patented eight-piece kit machined
in-house from
billet 6061 aluminum with stainless steel hardware. The supports fill the voids in the factory
rubber subframe bushings, preventing up-and-down movement of the subframe.
- IRS Subframe Alignment Kit (555-4438): CNC-machined delrin dowels that fill the
factory bolt hole
voids. These square the rear subframe to the chassis and limit side-to-side and front-to-back
movement of the subframe under acceleration and braking.
Hardware List
| Component |
Quantity |
| Driver Side IRS Brace |
1 |
| Passenger Side IRS Brace |
1 |
| Threaded Plate |
2 |
| Short Hex Head Bolt |
2 |
| Medium Hex Head Bolt |
4 |
| Long Hex Head Bolt |
2 |
| Longest Hex Head Bolt |
2 |
| Small Washer |
4 |
| Large Washer |
4 |
| Thick Upper Front Bushing Support |
2 |
| Thin Upper Front Bushing Support |
2 |
| 2 Piece Lower Rear Bushing Support |
2 |
| 1 Piece Lower Front Bushing Support |
2 |
| Small Allen Head Bolt |
4 |
| Front Alignment Dowel |
2 |
| Rear Alignment Dowel |
2 |
Tools List
- 13mm Socket
- 15mm Socket
- 16mm Socket
- 21mm Socket
- Socket Extension
- 5/32 Allen Wrench
- 18mm Wrench
- Torque Wrench
- Grease (Optional)
Difficulty, Time, and What You're Getting Into
Steeda calls this a moderately difficult install, and you're looking at about three hours start to
finish. A four-post lift makes life easier, but you can absolutely get it done on jack stands with the
rear of the car up and solidly supported.
There are two things to know about this install. First, you won't need to cut, drill, or make any
permanent changes. Every part bolts into factory locations, so you can always return the car to stock if
you want. Second, installing the bushing supports and dowels means loosening and removing subframe bolts
one at a time. The subframe stays put with the other bolts in place, but you have to follow the sequence
to the letter. Never pull more than one subframe bolt out at a time.
You'll need a wheel alignment after the install, so plan for that when you're mapping out the job.
Phase One: Bushing Supports and Alignment Dowels
Phase one is all about installing the bushing supports and alignment dowels at the subframe mounting
points. The steps below walk you through one side of the car, finish that side completely, then repeat
everything on the driver's side.
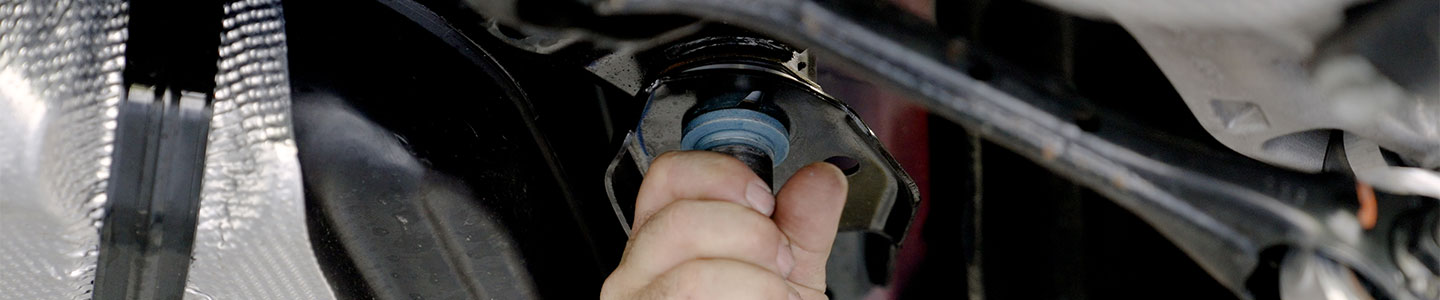
- 1. Towards the front of the rear subframe remove the two 13mm bolts and the 21mm bolt holding
the subframe bracket in place. Remove the bolts completely.
- 2. Towards the rear of the subframe, loosen, but do NOT remove the bolt completely. Only 1 sub
frame bolt should be removed at a time.
- 3. Place the bushing supports both top and bottom in the front of the subframe. Refer to figure 6
for the correct orientation. The thicker support will go up top.
- 4. Before reinstalling the 21mm bolt, place the shorter Alignment dowel in the front of the
sub-frame.
- 5. Reinstall the front bracket & 21mm bolt where the threads are engaged, but not tightened down.
This
allows the subframe to hang slightly to allow for clearance in the rear. Remove the rear bolt
completely.
- 6. The two-piece bushing support will be installed in the lower rear section of the subframe. A bit
of grease and some pliers will help get it into place. Then evenly tighten the two 5/32 allen bolts.
- 7. The thinner bushing support will be installed up top in the rear. The taller, thinner alignment
dowel can be installed as well.
- 8. Tighten the two subframe bolts and torque to 129ft/lbs. The smaller bolts on the front bracket
will be torqued to 41ft/lbs. Repeat the installation on the driver's side.
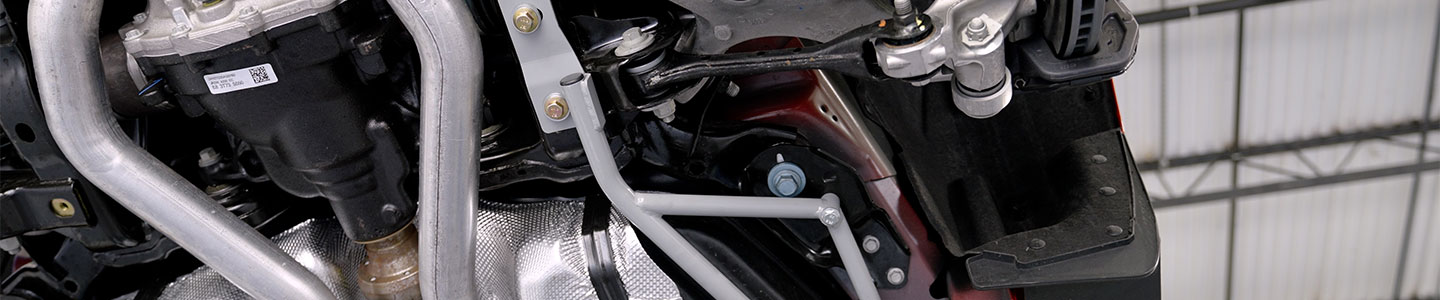
Phase Two: IRS Support Braces
Once the subframe is squared up and the bushings are locked down, it's time to install the braces to tie
everything to the chassis. Just like before, finish one side completely before moving to the other.
- 9. Remove the two bolts along the framerail.
- 10. Insert the threaded plate into the subframe as shown in figure 19.
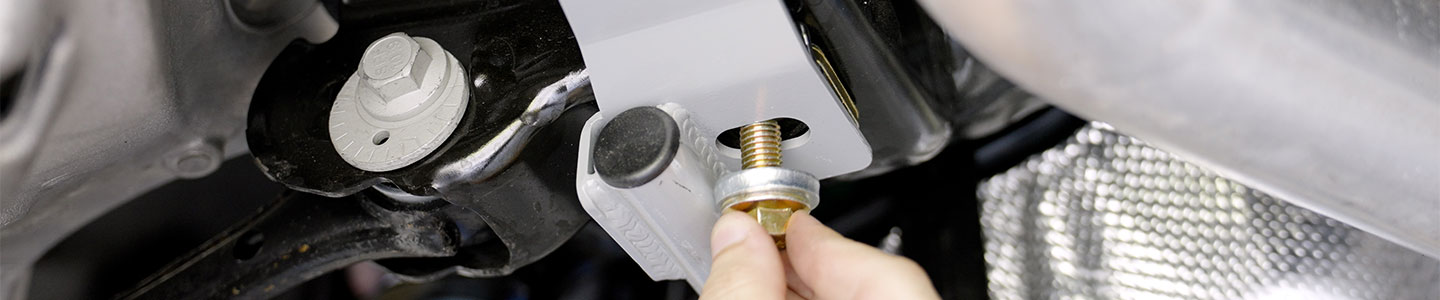
- 11. Place the IRS brace up in place and use the longer bolt to secure it to the front subframe
bracket. Leave this bolt loose.
- 12. Towards the front, install the two shorter bolts and large washers. Leave these bolts loose as
well.
- 13. In the rear, install the smaller bolt & washer into the threaded plate you installed in step 10.
- 14. Place the nut on top of the subframe and the longer bolt & washer can be installed to secure it
in place.
- 15. Once all the bolts are started, tighten down the center first, then tighten the front and rear
bolts.
- 16. Torque the 2 rear bolts to 55ft-lbs. Torque the center and front two bolts to 45ft-lbs. Repeat
this process for the driver's side.
After Install
Get the car aligned. Moving the subframe mounting points changes the rear suspension geometry enough that
an alignment isn't just a good idea, it's mandatory. Skip it, and you'll pay for it in tire wear and
handling.
Once you've got the alignment dialed in, the difference is obvious the first time you put the power down
on a less-than-perfect surface. The subframe stays locked in place, so the rear axle plants exactly
where the suspension geometry wants it. Because the kit fills the voids instead of swapping in stiffer
bushings, you get all the control. You don't add noise, vibration, or harshness in the cabin. That's the
whole idea: fix the movement at the mounting points, keep the factory isolation, and leave the car just
as comfortable as before. Now, the hop is gone.
Torque Specification Quick Reference
| Fastener |
Torque |
| Subframe Bolts |
129 ft-lbs |
| Front Bracket Bolts |
41 ft-lbs |
| IRS Brace Rear Bolts |
55 ft-lbs |
| IRS Brace Center and Front Bolts |
45 ft-lbs |