

Click anywhere to close
How to Lower a Ford Maverick the Right Way
How to lower a Ford Maverick the right way: spring options, real drop specs, alignment tips, and why the parts you pick matter.
The Maverick’s tall stock ride pays off with cargo or rough roads, but it leads to body roll, nose dive, and a sky-high look over the wheel arches. Closing that gap is one of the most satisfying changes you can make to this little pickup, and it pays off in both stance and handling.
This guide shows how to properly lower a Ford Maverick, explaining your options, their effects, and the supporting parts needed for proper performance.
Why Ride Height Changes Everything
Lowering isn’t just about appearance. A lower center of gravity sharpens handling and stability, helping you feel more in control and confident in your Maverick.
When the Maverick sits lower, weight transfer slows down. The body stops pitching forward as aggressively under braking and rolls less through quick direction changes. The tires stay planted in a more consistent contact patch, which is where grip comes from in the first place. You get a truck that feels tied down instead of floaty, and it happens the moment you pull out of the driveway.
The catch is that ride height and suspension geometry are linked. Change one, and you change the other. That's why the right approach is about the whole package, not simply throwing on shorter springs and calling it done.
Lowering Springs Are the Foundation For Lowering Your Maverick
For most Maverick owners, lowering springs are the solution. These shorter, stiffer coils replace the factory units, dropping the truck and firming up the ride. They retain your original struts and shocks, making them simpler and less expensive than coilovers or air suspension.
Spring rate is often overlooked. Good lowering springs aren't just shorter, they're tuned to balance handling and ride comfort for a smooth, controlled drive. A stiffer front rate reduces dive under braking, keeps the truck level, and improves stopping. The right balance means better handling without giving up ride quality.
A few realities worth knowing before you buy:
- Your drivetrain matters. AWD and FWD EcoBoost Mavericks share the same basic setup, but the hybrid uses a different rear arrangement, and not every spring is rated to fit it. Always confirm fitment against your exact configuration.
- Front and rear drops are rarely equal. Most Maverick springs drop the rear more than the front to level out the factory rake.
- And remember, you will need an alignment afterward. If you're unsure about suspension geometry, seeking professional help ensures your tires wear evenly and your safety is maintained.
What's The Best Ford Maverick Lowering Springs?
There's a real spread in how aggressive these kits are, and the right pick depends on whether you want a subtle factory-plus stance for daily driving or a more aggressive, sport-truck look for weekend fun.
Consider your driving style, typical roads, and styling aims when choosing between options such as the OEM-style Ford Performance kit and the more dramatic Steeda Sport Lowering Springs. Here's how the popular options stack up on an AWD Maverick.
| Spring Kit | Front Drop | Rear Drop | Notes |
|---|---|---|---|
| Ford Performance M-5300-MV | ~0.4 in | ~1.0 in | OEM equipment on the Maverick LOBO keeps the factory ride feel |
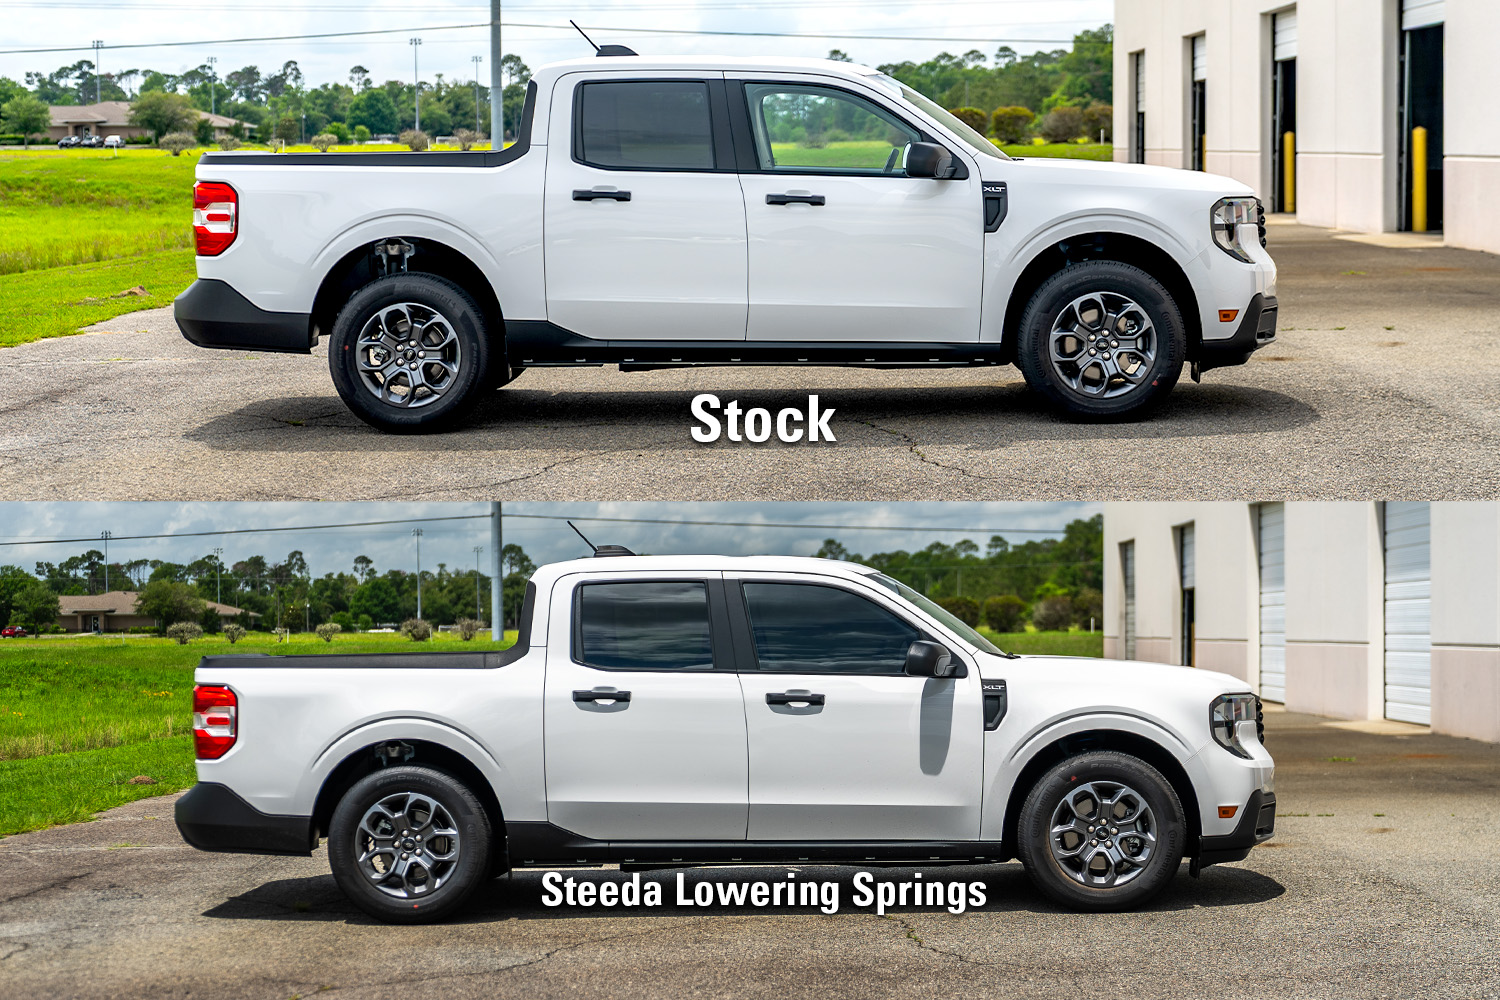
| Steeda Sport Lowering Springs | ~1.5 in | ~2.25 in | Higher front rate for less brake dive; lifetime warranty |
| Eibach Pro-Kit (AWD/LOBO) | ~2.0 in | ~2.9 in | The most aggressive drop in the group |
The Ford Performance set offers the mildest drop, making it appropriate for those wanting a subtle correction with no noticeable change in ride character. The Eibach Pro-Kit delivers the lowest stance as well as the firmest ride, with a focus on maximum visual impact and sportiness. The Steeda Sport Lowering Springs strike a balance between the two, offering a moderate drop with improved handling and comfort, making them a well-rounded choice for most owners.
What Sets the Steeda Lowering Springs Apart
Steeda Sport Lowering Springs stand out for their high-silicon-content steel construction, which delivers improved ride quality for a given spring rate compared to more basic steel. This engineering focus balances stiffness for body control without excessive harshness, setting Steeda apart from others aiming for similar performance gains.
The drop figures (roughly 1.5 inches front and 2.25 inches rear on a 2.0L AWD truck) hit the sweet spot. Low enough to transform the stance and tighten the handling, high enough to keep daily usability intact. They carry a lifetime warranty and are tuned by a company that has spent over 35 years building Ford suspension systems.
Ready to lower your Maverick?
Shop the Steeda Maverick Lowering SpringsWhat You Need Beyond the Springs
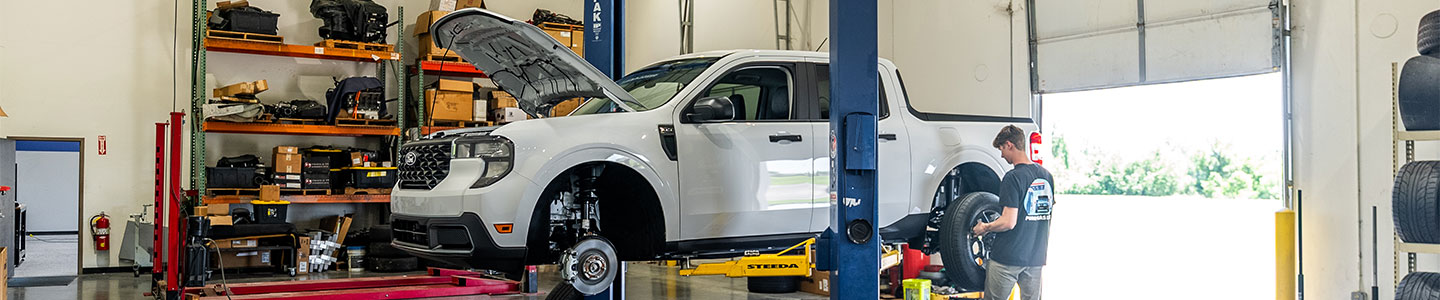
Here's where a lot of lowering jobs go sideways. The springs are only one piece of the geometry puzzle.
Lowering a Maverick changes the rear suspension angles, altering alignment, especially toe and camber. AWD models lack factory rear camber adjustment, so final alignment depends on your lowering parts. Toe can be corrected, and it's crucial for tire wear.
This is why Steeda strongly recommends pairing the springs with their 555-4136 Adjustable Rear Toe Links. They give you the adjustment range to dial the rear toe back to spec after the drop. They're TIG-welded from thick steel, powder-coated, and finished with a nickel-plated adjuster to resist rust, and they carry a limited lifetime warranty. Beyond simply enabling proper alignment, the heavier construction adds a more solid, connected feel at the rear of the truck.
A reasonable build order looks like this:
- Install the lowering springs. This is the core change and sets your new ride height.
- Install adjustable rear toe links while you're in there, so you have the range to correct alignment.
- Get a professional alignment as soon as the install is done. Have the shop set toe to spec and check camber.
- Recheck after a few hundred miles. New springs settle slightly as they seat, and it's worth a second look.
If you want to keep building from there, a rear sway bar and a strut tower brace are the natural next steps to further tighten up body control. But the springs are the foundation, and they're what genuinely answer the question of how to lower a Ford Maverick without creating new problems.
How to Install Steeda Maverick Lowering Springs
This is a moderately difficult job. If you have done struts on a car before, you can handle it. If you have not, this is a reasonable first big suspension project, but read through the whole process first, and do not rush.
What You Need
- Floor jack and jack stands (2-ton minimum)
- Spring compressor (do not skip this, ever)
- Torque wrench and metric socket set.
- Steeda Sport Lowering Springs
- Penetrating oil for stubborn fasteners
Budget about 3-4 hours if everything goes smoothly. Add another hour if you have never done it before.
A word of caution before you start. Coil springs store a tremendous amount of energy. If you are not confident pulling and reinstalling front struts and springs, hand this job to a qualified technician. A coil spring compressor is mandatory, not optional, and the vehicle will need an alignment afterward. Always pull torque specs from a service manual.
Step-by-Step Overview
Removing the Factory Front Springs
- 1. Lift the truck by the chassis on a lift or jack stands so the front wheels are off the ground. Confirm the truck is stable before you work around or under it.
- 2. Remove the front wheels.
- 3. Disconnect the sway bar end link from the strut. Then disconnect the ABS cable from the strut by removing the plastic clip and grommet holding it in place.
- 4. Unbolt the strut from the spindle.
- 5. Before you go further, mark the orientation of the upper strut mount so you can line it back up the same way on reassembly.
- 6. From under the hood, remove the three bolts holding the strut mount to the strut tower.
- 7. Remove the strut assembly. Secure the spindle and brakes to the body with a piece of wire so nothing hangs on the brake hose or ABS cable.
- 8. Compress the coil spring with a spring compressor until there is little to no pressure on the mount and the spring moves freely between the strut and mount.
- 9. With the spring still compressed, remove the nut from the top of the strut and pull the mount off.
- 10. Remove the factory front spring.
Installing the Steeda Maverick Sport Front Springs
- 1. Install the Steeda Sport front spring.
- 2. Start the top nut by hand. Slowly release the spring compressor to apply tension to the strut mount, then torque the top strut nut to factory spec.
- 3. Reinstall the strut in reverse order of removal.
- 4. Repeat the process on the opposite side.
Removing the Factory Rear Springs
- 1. Lift the truck by the chassis so the rear wheels are off the ground, confirm it is stable, and remove the rear wheels.
- 2. Support the lower control arm with a hydraulic jack and remove the two control arm bolts.
- 3. Remove the factory springs, then transfer the factory isolators to the Steeda lowering springs.
Installing the Steeda Maverick Sport Rear Springs
- 1. Install the Steeda Sport rear springs. The left-hand wound spring goes on the passenger side. Repeat on the opposite side.
- 2. Reinstall everything in reverse order.
One detail that trips people up: make sure the truck's full weight is on the springs before you tighten the lower control arm mounting point. Torquing it while the suspension is loaded misloads the bushings and shortens their life.
Final Checks Before You Drive
Recheck every fastener to confirm it is secure. Then take a careful test drive in a controlled environment, recheck the fasteners, and get the truck aligned before you put any real miles on it.
See The Difference
Frequently Asked Questions
Steeda springs do not currently fit Hybrid models. The spring perch geometry differs from that of the EcoBoost trucks.
Yes. Always. There is no shortcut. Lowering changes camber, caster, and toe angles, and driving without realignment will burn through tires in a hurry.
The Maverick's tow rating drops once you change the spring rates, and the lower stance reduces the angle you can clear a trailer hitch over. If you tow regularly, lowering springs are probably not the right call.